We still see it happen in Missoula: a contractor digs a foundation in the Rattlesnake area relying on a rough soil map, hits buried cobbles and organics 4 feet down, and the schedule blows out by two weeks. An exploratory test pit would have shown that contact zone immediately. In our lab, we treat the test pit as a primary investigation tool, not just a quick hole in the ground. The Missoula Valley has a messy subsurface — glacial lake sediments interfinger with coarse Clark Fork River deposits, and in many neighborhoods you find old irrigation ditches that were filled decades ago. A properly logged test pit, sampled according to ASTM D2487, gives you the ground truth that desk studies miss. When we excavate a pit, we measure stratigraphy right at the face, collect bulk samples for grain size analysis back at the lab, and photograph the sequence so the design engineer sees exactly what we saw. It is the fastest way to calibrate a boring plan or confirm a bedrock depth before committing to a foundation type.
A test pit in Missoula's glacial sediments often reveals more in 20 minutes than a boring reveals in an afternoon.
How we work
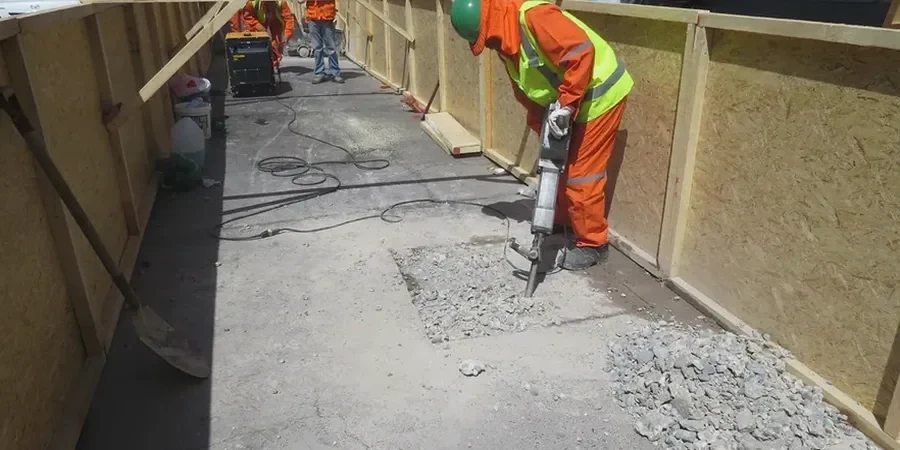
A recent job on a commercial lot near Reserve Street illustrated why depth matters here. The site sat on what the USGS map labeled as Quaternary alluvium, but the developer needed to know if a shallow footing system would work without overexcavation. We put down a 12-foot test pit and encountered a distinct paleosol layer at 7 feet — dark, organic-rich, compressible — sitting right on top of a clean gravel unit. Without the pit, that layer might have been missed by a standard auger boring that averages recovery over 5-foot runs. We logged the face in detail, took moisture samples, and ran a pocket penetrometer across the exposed profile. The geotechnical engineer used our field description to redesign the footing elevation, saving the owner from undercutting the entire pad. We also coordinate with local Missoula utility locators before every excavation; the last thing anyone wants is to hit a fiber line along Brooks Street. Our process includes traffic control plans when we work near roadways, and we backfill with compacted lifts if the pit is inside the building footprint. Deeper pits require shoring, and we follow OSHA Subpart P for trench safety — no shortcuts.
Local considerations
IBC Chapter 18 and Missoula's adopted building code require a geotechnical investigation for all commercial structures, and the test pit often serves as the first confirmation step. The risk of skipping this phase in Missoula is tied directly to the valley's depositional history. Glacial Lake Missoula left behind rhythmically bedded silts and clays that can soften dramatically when exposed to water, and the city's irrigation legacy means perched groundwater shows up in unexpected places. We have seen projects on the north side where a contractor opened an excavation in August, found dry gravel, and assumed a bearing capacity of 3,000 psf — then hit saturated silt at the same elevation in April. A test pit in the wet season would have told a different story. Slope stability near Mount Jumbo and the South Hills is another concern; colluvium over bedrock can slide if the contact is not identified early. Our field team documents every seam and moisture change, because those details determine whether a footing needs to go deeper or whether a retaining wall drain is mandatory. In Missoula, the cost of a test pit is measured in hundreds of dollars; the cost of a foundation redesign after concrete is poured runs into the tens of thousands.
Questions and answers
What does an exploratory test pit cost on a typical Missoula residential lot?
For a standard single pit up to 10 feet deep on a residential lot in Missoula, our fee typically falls between US$560 and US$780. This includes mobilization with a compact excavator, excavation, detailed logging and photography by our field technician, bulk sampling, backfill and compaction, and a summary report with lab test recommendations. Deeper pits, multiple pits on the same day, or sites requiring traffic control near busy streets like Higgins Avenue will push the cost toward the upper end or slightly above.
How do you backfill a test pit so it does not settle later?
We backfill in 8- to 12-inch lifts, compacting each lift with a mechanical tamper. If the pit is inside a future building footprint, we compact to 95% of standard Proctor density and document the effort. The material goes back in the same order it came out, with the topsoil placed last. In Missoula's silty soils, we control moisture during compaction to avoid bridging; too dry and the silt will not densify, too wet and it pumps.
Can you dig a test pit if my site has steep access in the Missoula hills?
We work with a local excavation contractor who runs a rubber-tracked mini-excavator that handles slopes up to about 30 degrees. For steeper sites in the South Hills or near Pattee Canyon, we assess access during the site walk and may recommend a track-mounted machine or a smaller unit that can be walked in. Safety is non-negotiable — we will not set up on a slope where the machine's stability is marginal.
How does a test pit compare to a standard SPT boring?
A test pit gives us a continuous, large-scale view of the soil profile that a boring simply cannot match. We see lenses, seams, and contacts that a split spoon sampler averages out over 18 inches. The trade-off is depth: pits rarely go beyond 14 feet without shoring, whereas an SPT boring can reach 50 feet or more. In Missoula, we often use a test pit to characterize the upper bearing strata and then extend the investigation with a deeper boring if the loads require it. The two methods complement each other, and the pit helps us pick the right depths for SPT sampling.